Monday, August 6, 2012

AND THE WINNER OF THE CHRISTMAS BLOG HOP

First, above all, I want to thank Madame Samm and Leslie for letting me join along in their Christmas Blog Hop. They did a "FABULOUS JOB", to say the least.  I can't believe it is over already.  


                           Christmas Card 01


I don't know about anyone else, but, I had soooo much fun.  I visited everyone's blog!  I seen the cutest Santa's and Snowmen, Reindeer and Angels, etc.  


                       Christmas icons BY sniffels    
            

I read tutorials and learned a lot of different techniques  and ideas.  I seen blocks of all kinds.  And the way some of them were presented, really showed them off.


                                     Free Christmas Wallpaper
                   

I also got to talk to a lot of other quilters and make a lot of new friends. To me that is priceless....


                                   disney christmas Wallpaper


So... "THANK YOU"  to everyone!


Now, for what you are all here to read.   The winner of the 10 Christmas Fat Quarters....

First I want to Thank everyone for the lovely and encouraging comments.  I truly enjoy reading them.  I hope you keep coming back.

OK, I went to random.org.   And the counter came up with the number 24
                       
      The Winner is:       Sally   of Sally's Sampler


CONGRATULATIONS: You will be receiving an e-mail from me confirming your winnings.

BUT WAIT.....  There is more news.  I want to remind everyone of the "BOWLS WITH BOARDERS" Blog Hop.  


                        Sew we quilt

It will start on August 13th until August 28th.  So come join us all in the fun!!!


Check my website gallery for more selections: http://janesquilting.com

Wednesday, August 1, 2012

Christmas Blog Hop and Giveaway

IT'S THE CHRISTMAS BLOG HOP,   Today is my day today. And what a day it is.  Come see my newest design and don't forget to enter my Christmas Fat Quarter Giveaway…

Oh yeah, the “Bells are Ringing“ Today,


I have been having so much fun checking my Christmas fabrics I forgot all about how hot it is here at my house.  I decided to make something with bells on, so I dug out some fabrics that I thought would work.   (I thought the gold shimmer of these fabrics all went together well.)


Then I drew my bells for the center of my Wall Hanging.


I put my appliqué of the Bells on an 8 inch square.  Then machine appliquéd them on using monofilament thread so not to be seen.  When finished, I squared it off to a 6 ½” block, centering the bells diagonally.

Next was to make the remaining blocks.  Each are 6 ½” square.  I used assorted fabrics to set them off.  I made a total of 8 of these:


And then 4 of these blocks.  


From here I set them all together diagonally with the bells in the middle.  I had to do something with the edge triangles.  So I came up with these:


For the boarder, I used scraps and put a 1 inch boarder, then I used the gold and made a 1 ½” boarder.
SO HERE IT IS:    


"BELLS ARE RINGING”     total size is 31” X 32”


                       NOW, for the Giveaway.   


I am Giving away 10.…YES, 10 Christmas Fat Quarters.  These are all beautiful Fat Quarters which I know you will have lots of fun with.


It is easy to enter, All you have to do is join my blog and leave me a comment.  (Make sure I get your e-mail)  Contest will run from now till the end of the Christmas Blog Hop on August  5th  


 I will post a winner on August 6th.  So, good luck, and don’t forget to check out the other Blogs in this Hop.   I have made a list of those who have blogged today. 


Don't miss out on the fun, Please check out all the rest of the blog hop.  It will continue on till August 5th.  There is a list on: The Cuddle Quilter .  Each day there will be more to check out.    


HAVE FUN, AND HAPPY QUILTING.


Check my website gallery for more selections: http://janesquilting.com

Tuesday, July 24, 2012

Making Quilt Labels


How do you make labels for on the back of your quilts?  Do you make each one different, or to match the quilt, or do you have a regular style for all?

Most all my labels I like to put the name of the quilt, date it was made, my name and where I live.   Here are a few of my labels.  Some  are plain, but to the point.


Other times I like to add applique to match the front of the quilt.  Such as these:


Here is one that I made for on the back of my daughters Wedding Wall hanging.  I wrote a special poem with a hand applique dauphin.

.

On my 1930's Replica quilt, I drew all my pictures, then colored them in, and embroidered the outlines of the pictures.  So for the label, I did the same.


This is one I put on my Brother and his wife's "Rose" quilt.


Then there is the poem I placed in back of a baby quilt.  


This went on a quilt for a young man that loves his music.


I also made one with a fabric envelope, inside the name of the quilt, etc.  But also washing instructions and small pieces of the fabric that was used on the quilt.


R


However you make your label - have fun with it.  Remember, this is your signature on your quilt.  So make it you!

AND on that note....Are you thinking CHRISTMAS yet?  You should, cause it won't be long and it will be time for the Christmas Blog Hop

That's right, starting July 30th thru August 5th I am going to be in a Blog Hop with Leslie Carruthers of "The Cuddle Quilter" and Madame Samm of "Sew WE Quilt" along with many other quilters.  


                                   Welcome to our Christmas

You will find blocks with Santa's, Snowmen, etc.

                                             The Christmas trees can be

There will be all kinds of Red and Green blocks, tutorials and oh, yes, "GIVEAWAYS".  I myself will be having a giveaway of fabulous Christmas Fat Quarters.  (My blog will be August 1st)      SOOO, Come join our Blogs and don't miss out on any of the fun!


                                            Christmas Mickey Mouse


Until then.....HAPPY QUILTING EVERYONE!!


Check my website gallery for more selections: http://janesquilting.com

Friday, July 13, 2012

Disney Quilts

I made another DISNEY quilt.  This one is a unique one that I designed.

Do you remember my last one I made last summer?

                                                     "MICKEY MOUSE"

This one is 46 1/2" X 46 1/2", it has 7  blocks of embroidered Disney characters.  They are: Minnie Mouse, Donald Duck, Daisy Duck, Goofy, Pluto and of course Mickey Mouse.  In the center of the quilt is Mickey and Minnie dancing:


This year I took the same characters, plus a few more poses, and added them to a larger quilt.


This one has a total of 14 different blocks with Disney characters, each are different.  The total size of this quilt is:  80 1/2" X 90 1/2" .  It was made for a special little girl in Southern Texas.  I hope she enjoys it.


I ALSO want to remind everyone of CHRISTMAS IN JULY.   Follow my Blog, Mark your calander,  You don't want to miss out.  It is a Blog Hop with  The Cuddle Quilter and many others.  There are going to be tutorials, beautiful Christmas blocks, and Giveaways....oh yeah, I am givingaway special fat quarters.  


The Blog Hop will start on July 30th going thru August 3rd.  Each day different blogs will come alive with excitement.   Watch for the  Christmas stamp above and follow the blogs.........  


Till then, you will find me in my room, quilting away, getting ready.....

HAPPY QUILTING EVERYONE!!!

Check my website gallery for more selections: http://janesquilting.com

Thursday, June 21, 2012

Not Just Another Bag

That is right....This is not just another bag.  This is a perfect Purple bag that I had made our Beautiful Niece.

Oh, yeah, I made another bag.  This one was made specially for our niece.  Her favorite color is Purple, so I got out all my purple fabric and tried to figure out how I was going to make it.


It always takes time to pick out the fabric.  I think it is part of the fun in making things.  Got to find the perfect matches.  

I made my straps first.  Cut them 4 inches wide and made them as long as my fabric I choose allowed.  Folded them in half, added batting, sewed wrong sides together, then turned them inside out.


I sewed the straps to the front and back panels, then carefully quilted both front and backs.  (I quilted a grid pattern)


Next, I made my pocket on the outside before adding the lining.  I decided to put a heart on the pocket and a button.  When finished I added a small Velcro closure.


I sewed the front to the back then made my lining.  Oh, and I put 3 different size pockets on the inside.  

Last but not least  -  I added a binding around the top for neatness and durability.


Total finished size is:   12" X 16" X 4" .  AND  I am happy to say that our niece likes her bag.

Heading back to my room........

HAPPY QUILTING EVERYONE


Check my website gallery for more selections: http://janesquilting.com

Wednesday, June 13, 2012

Purrfect Pin Cushions

I made the Purrfect Pin Cushions today.  I seen the article in a magazine by Desiree Habicht.  They were too cute not to make.

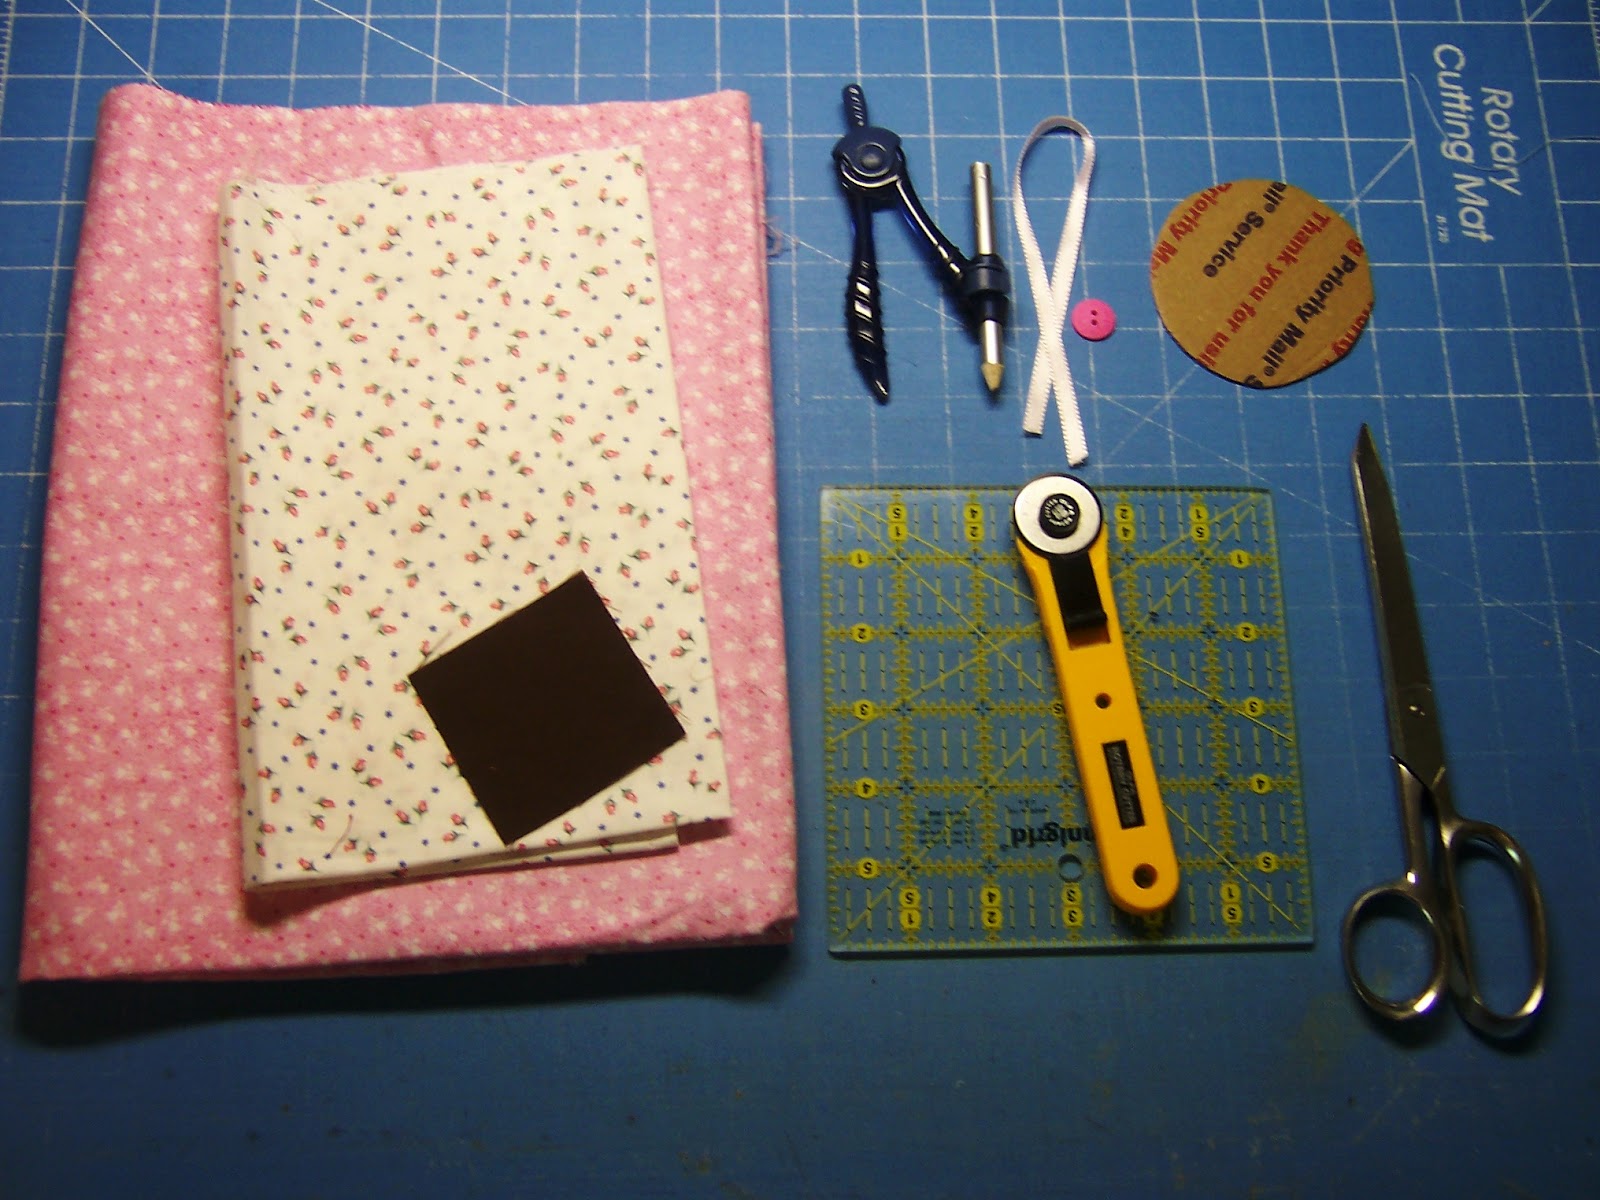
All you need is your fabric, ruler, scissors, (Oh, and don't forget the stuffing.....)


After I gathered all that I thought I would need....I stuffed my head (ball) first.


Then my muzzle and attached it to the head (ball).


I wrapped embroider thread around and found a cute button that matched.  It had to have a nose!  Then I sewed the ears on, then eyes, and added a Pink Bow.


Isn't it cute??


BUT WAIT!!!   Why stop with just a cat!   I had to make a DOG too.


It was a nice little brake from quilting.  I have been really busy lately, but not complaining.  These little guys were a lot of fun to make and so easy too.   


OK,   Now on to my next quilt.........

HAPPY QUILTING EVERYONE........


Check my website gallery for more selections: http://janesquilting.com

Monday, June 4, 2012

Hampton's Roses

My "Hampton's Rose" quilt is completed and I am proud as to how it turned out.  It was more involved than my other quilts but was well worth it.  This one took me over a month to make.

When I first get an idea, I either grab a pencil and my notebook, where I keep my graft paper or to my lap top.  Then I start to draw and design what I want and make a rough graft.

When I decide what design I want, I draw my patterns for my applique.


I dug into my stash and hunted for the colors that I wanted for my roses.  It was almost a given that I was going with reds and pinks.  I decided to throw in some yellow  roses for variation and a blue vase to add a little pizzazz.  Using  lite, Steam a seam II, I started cutting out my pieces and arranging them onto the blocks.


That took time but was a lot of fun arranging everything as to where I wanted them.  Of course, I did not go exactly as I drew my picture, but that is ok, that is me.  I pressed them on and they are ready to applique.


As I made each block, I also embroidered on the flowers to set them off.  This I could do on my porch swing and enjoy the birds, butterflies, etc. at the same time.


I made a total of 5 bouquet blocks, and 4 each of the wreath and floating roses.  I squared them all to a 10 ½ inch squares.


Next I made my stepping stone blocks.  I picked matching fabric with just a little print.  I made 12, all measuring 10 ½ inches square. 


Next, was to work on the boarder.  I wanted to be different, so went back to drawing and came up with this:


Again, after appliquéing them on, I embroidered each flower and bud to match the quilt and to make them look more real.


The rest was easy, sewed them all together and quilted them on my machine.  I outlined all the appliqué including the boarder.  I quilted a ring of feathers in the stepping stone blocks.  Then hand sewn my binding on. 

Here is my Hampton Rose:


Total size is:   67” X 67”


Please leave a comment, I would love to hear from you and tell me what you think of my "Hampton's Rose".  

Off to my next project............

HAPPY QUILTING EVERYONE…HAVE A GREAT DAY


Check my website gallery for more selections: http://janesquilting.com