Friday, April 26, 2013

Shake your POM POM'S


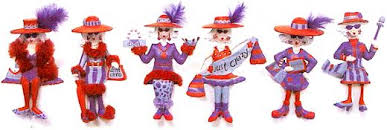
WOW, did you see all the BEAUTIFUL Pom Pom's so far??  I think everyone needs to give themselves a pat on the back for a great job, well done!!

ALSO,   lets raise our Pom Poms and give a  BIG    "Cheer" of "Thanks"  to  Pig Tales and Quilts and Madame Samm for all their hard work, and making this hop so much fun.


So what could I make to help cheer, to shake pom pom's and show my support..........Why now Sallie??  Yeah, I got out my paper and came up with Sally shaking her Pom Pom's for EVERYONE!


She is so much fun to make.  I made my pattern and cut her out using my scraps and arranged her on my fabric.  I did a white background and green grass, to represent a field.   I wanted to add a cheer but this time I was really stumped as to what to say.  (I talk a lot, so that is really rare)  I did not know any cheers.  I was not a cheer leader.  Oh, I did go to Football games, but well, lets say I seen the kick off and I knew what the score was when I got home if anyone asked.  LOL

So I came up with this:


I appliqued it on by machine.  Next was to make my pom pom's.  This was easy.  I do not have a machine so I make mine like this.  I get the color yarn that I want, then wrap them around my fingers about the size that I want them when finished.  I only wanted little ones so wrapped them around two fingers, 20 times. 


Then I carefully slid the yarn off my fingers onto the table and tied a strand yarn in the center, to hold them together.


Next, I took my scissors and cut the loops all open and fluffed it up.  I then shaped it to the size that I wanted.  I came up with these:


Oh, nooooo, not the eyes....how can I say no to those eyes.  


You see, every time I ever made a pom pom, KC wanted one too.  She loves when I put them in her cat nip.  


It seems as it is one of her habits when I sew.  
She comes in my room, and begs for a pom pom filled with cat nip.


  I keep quite a few in her jar. 


 It sure brings the kitten out.  (my son says she is addicted)


OK, on to my quilt.  My next step was to quilt the whole thing.  I carefully did a wiggly pattern all over.  When I was finished, I painted a face on Sallie, and sewed the Pom Pom's on her


I sewed a binding on and she was finished.


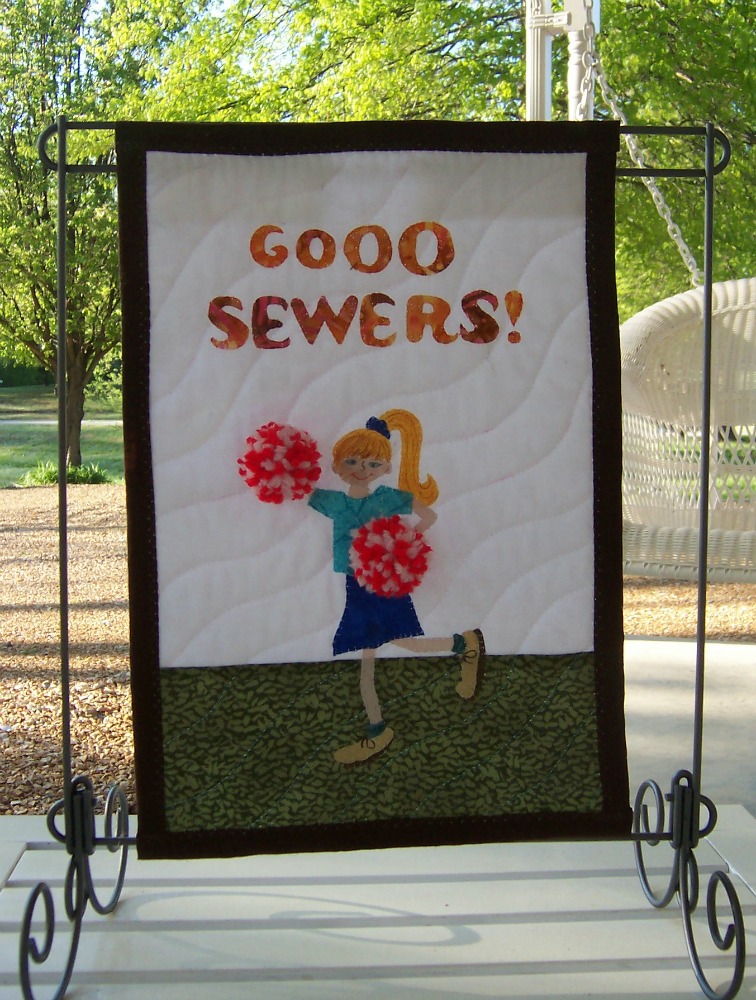
She is cheering everyone on!  So here is the list of others that have blogged today.  Come along with Sallie and give a BIG cheer them ALL for all their hard work.

 April 26

Here is next weeks schedule:

April 29


April 30


Check this out.....  I have a Giveaway going on.  EQ had given me a DVD to give to one lucky winner.  I started this giveaway yesterday but am running it till midnight April 30th.  It is for:


QuiltingDesigns5.png  Quilting Designs, Volume 5

This is a GREAT program whether you hand quilt, machine quilt or have a long arm.  It has over 800 designs and 10 Quilting videos.  

To make this fair, I am taking comments from my previous blog ( Critters & Bugs) first, then adding the comments to his blog.  So EVERY comment counts.  You only need to comment once to enter.  But you must be a follower of mine.  (No more than one comment each)  On May 1st, I will go to random.com and announce the winner.  So good luck to all!

Now, stop reading, enter, and PLEASE, go check out the rest of this hop and help Sally do her cheer!

HAPPY QUILTING EVERYONE!


To get special designed quilts or to see my gallery, check out my site at: http://janesquilting.com

Wednesday, April 24, 2013

Critters & Bugs - EQ Giveaway

It is the Critters and Bugs blog hop and I want to give a big thanks Bea Lee for all her hard work and time she put into this hop. I also want to give a big thanks to EQ for their support and programs they have to help all us quilters. 

 I just got my EQ 7 not that long ago, so I am only learning how to use it.  It seems as every time I am on, I learn something new.  I would recommend this to EVERYONE that quilts.  I use to get out my graph paper and spend hours, drawing and figuring out size and dimensions of the blocks that I wanted to make.  Now, I just look in the block file on my EQ and I can design any block!   I love to design my own quilts.  And I know the more I learn this program, the easier it will be. 

OK, Critters.....I decided to make a Barn Quilt, my own style and add farm animals to the barns.  So I went to the blocks and picked which ones that I wanted.  I also altered a few.

 Here is a star block that I found.  I then added extra lines in the corner blocks. 


I chose the colors that I wanted to make my quilt from their fabric file.  You can scan your own fabric into the program so that way you see exactly what you are making and how it will look when completed.  But unfortunately,I do not have a scanner.  So at this time I match their fabric to what I want to use the best I can using the fabric that is with the program.
Here is the sample as to what I came up with as far as blocks.  (each block is 8 inches)


Then I drew all my barn blocks.  I wanted a different barn in each corner.   Here are two of my drawings.  (because I do not have a scanner I took a pictures, sorry they did not turn out so good.)  The blocks for on the barns were common blocks from EQ.  Each one is a different size to fit onto the barn.  Since I used simple blocks, I did not need a pattern for them.


\


I got out my scraps, I love using scraps and hunting for the right piece when I applique.  I then went by the directions on my Steam a Seam II and put all my barn blocks together.   Then I found pictures of animals on the internet.  I did a copy/paste method to my word perfect program.  I made them the size that I wanted then copied them onto white fabric to use in my appliqued barn blocks.


OK, time to make my barn blocks and show you my critters. 


What do you think?  The blocks on the barn were made and cut to size.  I did not have a 1/4 inch seam around the completed block for I pressed them on Steam a Seam carefully and appliqued them on by machine to my barns.


I added flowers, grass, rocks, etc, with my chickens, cows, sheep, and a black horse.


I appliqued them on by machine using monofilament thread and the blanket stitch.  That way my stitches would not be seen when the quilt was finished.  When I was finished appliqueing all the pieces on, I trimed the blocks to 8 1/2 inches square

Then I made my center.  Since I had all my barns, I made a farm house.  But wanted it was back in the early 1940's.  So first I did the background, the sky, field, and grass. 


This applique I did not make a drawing on a paper.  I just drew my pieces on the Steam a Seam for I knew just want I wanted.   I added a 38 Chevy pick up truck to the driveway.....


Oh, and of course hung some quilts on the wash line.


Then added an old red wagon and sat it in the yard


Then I added a 1940 John Deer tractor to the field.


Everything was also appliqued by machine like the barns.

I put everything all together, and quilted it carefully on my machine to accent the positive.  (the clouds, field, grass, etc.)  I then quilted in the ditch in the blocks.


Total size is:  33" X 33"

I also want to add that EQ not only helps you with blocks for large quilts, but baby quilts, wall hangings of ALL sizes, Table toppers, any shape or size quilt you can come up with.

Why, even Mug Rugs. I never made one so I just had to make a Mug rug for my tea when sitting on my porch doing hand sewing this spring.  I used one of their cute patterns.  I started by cutting out 5 - 2 1/2 inches square blue daisy printed fabric, 4 - 2 1/2 inch squares white fabric, and a 6 1/2 inch light blue square.  


Then proceeded to sew them together to make a nine patch and sewed it to the light blue square.


  Then I copied the pattern of the Butterfly and Daisy (the size I wanted) and made an applique for the plain blue side of my Mug Rug.   I appliqued them on by machine.


Then layered, and quilted in a grid pattern.


I know Butterflies are bugs....but they are the prettiest bugs I have ever seen.

OK, I know I cannot brag enough about EQ.  They have not only EQ 6 or 7, but MANY other programs that are great to help all us quilters.  Including quilting designs.  Oh, they are GREAT!

The Electric Quilt Company were so very kind.....they gave me this DVD of Quilting Designs, Volume 5, to GIVEAWAY.  OH, YEAH,     It has over 800 designs and 10 Quilting Videos!  It will guide you though the designs whether you hand quilt, machine quilt, or use a long arm machine.

To enter.....that is easy, Just be a follower and leave me a message.  Do you have EQ? what do you love best about EQ?


I will be in another hop starting tomorrow, but I will continue this giveaway through April 30th.  On May 1st, I will go to random.com and pick a winner.


Now that you have seen mine, come join me in checking out the rest on this blog hop.  You will find the list below:


Beaquilter (Summer Animals)
Janesquilting (Critters and Bugs)
Seamstobesew (Summer Stuff)

Friday April 26th
SewCalGal (Critters and Bugs)
Electricquilt

If you missed any of the other blogs this week, go to Beaquilter and you will find the schedule...DO check out all the Summer Animals, Critters & Bugs, and Summer Stuff.  You will have fun, for sure!  So grab a cup of coffee, sit back and enjoy......


Hay, also don't forget there is another hop going on.... "SHAKE YOUR POM POM'S.....this one is sponsored by PigTailsandQuilts.  So Shake your Pom Poms and Cheer all your fellow bloggers out!!

HAVE FUN AND HAPPY QUILTING EVERYONE

To get special designed quilts or to see my gallery, check out my site at: http://janesquilting.com

Friday, April 12, 2013

Red Hat Society

I just wanted to share with everyone that my first craft (before quilting) was crocheting.  My aunt taught me when I was a young girl.  I made afghans, shawls, scarfs, hats, baby sweaters, caps, booties, pillows, different animals, etc.  (gee that makes me sound old)  Anyway, I wanted to share my new adventure.

I crocheted a RED HAT with a PURPLE RIM and PURPLE FLOWER.  Check it out:


Did you ever read the story that goes with it?


WHEN I AM AN OLD WOMAN 

I shall wear purple
  With a red hat which doesn't go,          
 "Ode to the Red Hat Society" 
And doesn't suit me.
And I shall spend my pension
On brandy and summer gloves who know me are 
And satin sandals, and say we’ve
No money for butter.  I shall sit down
On the pavement when I’m tired
And gobble up samples in shops 
And press alarm bells
And run my stick along the
Public railings
And make up for the 
Sobriety of my youth.
"The Red Hat Society began
I shall go out in my slippers
In the rain and pick the ‘flowers in other people’s 
Gardens and learn to spit.
You can wear terrible shirts
And grow more fat 
And eat three pounds
Of sausages at a go or
Only bread and pickle for a week
And board pens and pencils
And beermats
and things in boxes.
But now we must have cloths that keep us dry
And pay our rent
And not swear in the street
And set a good example
For the children. 
We will have friends to dinner and
The Red Hat Society is a firm
Read the papers.  But maybe I 
Ought to practice a little now?
So people who know me are
Not too shocked and surprised
When suddenly I am old  I am old
And start to wear purple.

it's the Red Hat Society!


I do not know if they meet around where I live now, but when we lived in VA, there were a lot of women that would have fun together.  Their motto was to never grow up.  Just have fun.  And that they did!  They would go shopping together, have luncheons, etc.

Well, I had to make a scarf to go with my hat.


Now have the hat and the scarf, I am ready!

How about you???  What is your motto???


HAY did you hear???     There are some GREAT Blog hops coming up  

FIRST,   EQ Animal Blog hop....


go to:   Beaquilt
To get the Full Schedule

There are going to be full tutorials on
Animals, Critters, Bugs and Summer Stuff
All sponsored by EQ
Each participant will have a great
Giveaway from EQ
You will not want to miss it!!


                       NEXT:   Shake your POM POMS   


Go to:   pigtalesandquilts
To get the full schedule

You will see lots of POM POMS
big ones, little ones,
they will be showed off in many
different ways.
It starts on April 24th 
come shake your POM POMS with
everyone by going to their blogs.
Oh, I am sure there will be
BIG giveaways there also.


So till then, have fun, enjoy life, and hope to see you all at the hops

HAPPY QUILTING EVERYONE!

To get special designed quilts or to see my gallery, check out my site at: http://janesquilting.com

Monday, April 1, 2013

Treasure Star Keepsake

Spring is here, the trees are blooming, the flowers are all popping out everywhere.  I can hear the sound of lawn mowers in the distance.  The birds are all chirping as everything comes to life again.  (Oh, and lets not forget the sinus!)

I have just designed a quilt for the occasion.  I called it "Treasured Star Keepsake".  I wanted to do something different so I drew star blocks and put stars around them.  Then I then got out my fabric called Etchings by 3 sisters for Moda.  ( I did add a few of the Papillion line for contrast)


As you can see by the pattern, they were easy blocks to make, just lots of HST's. There are only 2 different pattern blocks.  Each block is 8 inches square.   It was all in the placing of the fabric at the right places.   Here is the first block.  I made 4 of these, one for each corner.


Next I made the red star identical to the one I had just made.  There are 9 of these blocks.


Then came the second pattern block.  I made 11 all together.   They are to go on in between the previously made star block.   

7 of these blocks were just like below.


But I added a dark side to 4 of these star blocks to go around my center star block.  I wanted to bring out the darker fabric to help show it off.  Like I said earlier, it is all in the placement of the fabric.


When I was finished making all my blocks (total of 24).  I sewed them all together where I wanted them all to be.  Now for the boarder.  I just had to do something a little different.  Since all the blocks were small stars inside a large star, I wanted all those stars inside a big star, which would be the boarder.  Do you see it?


I think the fabric kind of blended in but each corner has a dark square, the 4 HST's to be a corner of a star.


When I quilted it, I did an all over flower design to match the flowered etchings in the fabric.

This is one of my husbands favorite quilts.  He like the fabric for it reminded him of antique quilts.  Hence the name, "Treasure Star Keepsake".  I too think this turned out real nice.

Total size is 66 1/2" X 66 1/2".       


Hay, did you also hear.......
There are some good blog hops coming up in April. 
 The first is with lots of quilters that are designing their 
"Buggy" critter quilts through their EQ 7.  
There you will find animals, bugs, butterfly's  etc. lots of great fun. 
 Hosted by Bea Lee at Bea's Quilter.


EQ APPLIQUE'D ANIMALS 
APRIL 22 THRU THE 26TH.


Then comes the "Shake your Pom Poms"
sponsored by Madam Samm and Thearica Burroughs


SHAKE YOUR POM POMS
APRIL 24TH THRU THE 30TH


Hope to see you all there, you really don't want to miss either one.  Till then.....

HAPPY QUILTING EVERYONE


To get special designed quilts or to see my gallery, check out my site at: http://janesquilting.com