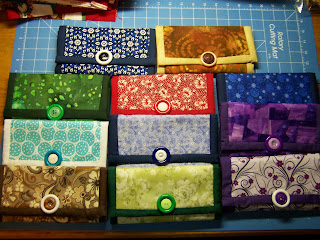
Want to have some fun with Fat Quarters and some of your stash? I have been making Tri Fold Wallets for Christmas presents. They are a lot of fun and easy to make. I bet you already have all the materials right in your room, waiting to be used.
Materials needed are:
2 - Fat Quarters
1 - 7" Zipper
Interfacing
7 1/2" X 12 Batting
Buttons
Velcro (I use 1/2" square)
To start you will need two 7 1/2" X 12 " rectangles, one for the outside and one for the inside.
Then cut one 7 1/2" X 4 3/4" , one 7 1/2" X 5 1/2" and one 7 1/2" X 6 1/4" These are the credit card holders.
(you will also need interfacing of the same size of each of your three cuts for strength.) Press them all and put the interfacing on the wrong side of your rectangles. Fold each one in half lengthwise:
Press (I use a little spray starch to make a crisp fold) then place them all together and set aside till later.
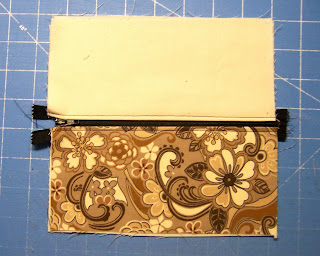
Next, cut four 7 1/2" X 7" squares. I cut one with the fabric I am using for the outside and the other three from the material I am using for the inside. You also need to cut two squares the same size for interfacing. Next, lay one square right side down, then the interfacing and another square right side up, press. Fold in half length wise and press again. (Again I use spray starch.) This is your change compartment.
Sew a 7 inch Zipper to each of the folded sides.
I then fold and square up with a ruler if necessary. Cut a strip 2" X 7 1/2" fold and press ( like binding) and sew on the bottom making sure to catch all the ends. Set aside.
Next, cut one 7 1/2" X 7" square of the outside material, and one of interfacing. Lay the interfacing on the wrong side and press both. Fold in half length wise and press. (Again I use spray starch)
Then cut a strip 2" X 7 1/2" and make a binding strip. Attach to the folded side. This is your dollar pouch.
Now it is time to put it all together. First place you bill fold on one side of the back panel. (Make sure your back panel is right side up.) I then baste it on along the outer edge to secure.
Then place your credit cards on the opposite side. Measure your middle, mark a line and sew to divide in half. Again I baste along the outside to hold in place.
Next, center your Change compartment in the middle with the zipper toward the bill fold. Sew along the binding strip to hold in place. Open the zipper and also sew along the zipper on the inside. This will hod your change compartment place.
Lay your outside rectangle wrong side down, place batting on top, then your inside.
Now cut your binding out. Cut two strips 2" X 7 1/2" for either end, and two strips 2" X 14" for the sides. Fold and press to make the binding. Then attach to the inside starting on the two smaller ends.
Sew carefully along the edge of the binding. Attach the two sides in the same manner. I put a credit card in the credit card holder as a guide to make sure I do not sew the binding in too far. Once I have it pinned, I remove the card and sew.
After the binding is sewn on, turn and pin to the front side, make your corners neat and square. I hand sew it to the outside for a neater look doing the blind stitch.
Fold and add your Velcro to the center inside the bill fold and on top of the credit card at the edge, that way when the wallet is folded, it will stay closed.
You are now ready to add a decorative button or buttons or whatever you wish for decoration.
Have fun and if anyone has any questions, please don't hesitate to ask. I sure would like to see your wallets.
Happy Quilting..........Have a Great Day!
Check my website gallery for more selections: http://janesquilting.com


No comments:
Post a Comment